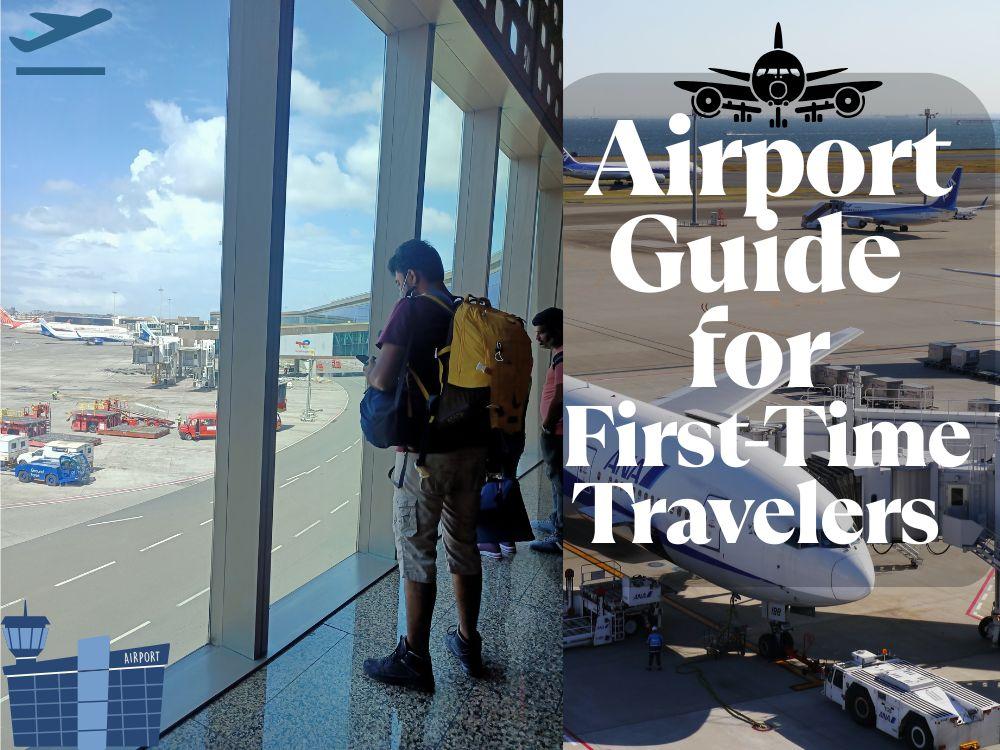
We all dream of flying in the air! There’s something magical about the idea. Soaring above the world, watching the land shrink below, feeling that slight thrill as the plane takes off. For someone like me, coming from a small town, flying wasn’t just a mode of travel; it was a dream I had carried for years. I had imagined it so many times, the bustling airport, the security checks, the thrill of stepping onto a plane for the first time. And then, in June 2022, that dream finally became a reality. I took my first flight, traveling to Mumbai and Goa, two places I had only seen in Bollywood movies, travel magazines, and Instagram reels. Excitement was at an all-time high, but let me tell you, my first time at the airport was nothing short of nerve-wracking.
You know that feeling when you step into a completely new world, unsure of what to do or where to go? That was me. The airport looked like a giant maze, endless counters, flashing screens, people rushing in all directions. My mind was racing with a hundred questions: where do I go first, what if I miss my flight, how does check-in even work?
")
If you’ve ever felt this way about your first time at the airport, trust me, you’re not alone. It’s overwhelming, confusing, and a little bit scary. But don’t worry, I’ve been through it, and I’m here to tell you, it gets easier. Let’s see how you can navigate your first airport visit with confidence.
My first flight experience was scary. You put a lot of money into it. It’s not just a few hundred rupees, it’s ten to twelve thousand and the last thing you want is to mess up your first flight. Right? My heart was soaring, racing, thumping, bumping, doing everything except staying calm. The excitement of finally flying clashed with the anxiety of what if something goes wrong? What if I forget something important? What if I board the wrong flight? What if I make a fool of myself at security? My brain was in overdrive, running through every possible disaster scenario.
But as much as the fear was real, so was the thrill. And I am sure your first time at the airport would have looked the same. No matter how much you prepare, the mix of excitement and anxiety is just unavoidable. I had even watched some tutorial videos on YouTube about how to navigate the airport for the first time. People made it look so simple, walk in, check-in, clear security, board the flight. But trust me, when you’re actually there, standing in the middle of a giant terminal with a suitcase in one hand and confusion in the other, it’s a whole different story.
Based on my experience and everything I learned along the way, I’m putting together this first-time flyer guide, a go-to resource packed with all the essential tips you need at the airport. From checking in to boarding, I’ll walk you through every step so you don’t have to rely on last-minute YouTube tutorials like I did. Consider this your survival manual for navigating the airport with confidence.
For better clarity and to make sure you don’t miss a single step, I’m breaking this first-time airport guide into two categories:
- Before Boarding: Everything you need to do from the moment you arrive at the airport until you step onto the plane. This includes check-in, security, and finding your gate.
- After Landing: What happens once you deplane, from collecting your luggage to exiting the airport hassle-free.
Before Boarding: Step-by-Step Guide for First Time at the Airport
Stepping into an airport for the first time can feel overwhelming. So many counters, gates, and security checks! But don’t worry. Follow these steps, and you’ll glide through the process like a pro.
1. Arrive at the Airport Early
The first step towards navigating the chaos of the airport for the first time is arriving early. Airlines generally recommend reaching the airport at least two hours before your boarding time for domestic flights and three hours for international ones. This might seem excessive, but trust me, that time vanishes quickly. From the moment you enter, you’ll go through multiple steps, i.e., document verification, baggage drop, security screening, and locating your boarding gate. Unexpected delays can happen, be it long security lines or last-minute gate changes. Arriving early ensures you have enough time to manage everything without stress, making your first time at the airport a smooth experience.
Do’s:
1. Carry both digital and printed copies of your ticket and ID for easy access.
2. Weigh your check-in luggage at home to avoid last-minute repacking.
3. Wear comfortable clothing and slip-on shoes for hassle-free security checks.
4. Keep your essentials (passport, boarding pass, wallet) in a single, accessible pouch.
5. Use airline apps to track flight status, gate changes, and check-in procedures.
Don’ts:
1. Don’t leave home without checking traffic conditions. Factor in extra time for unexpected delays.
2. Don’t assume all airlines have the same baggage rules. Confirm weight limits and restrictions in advance.
3. Don’t carry valuables in checked baggage. Always keep cash, electronics, and important documents in your hand luggage.
4. Don’t forget to check your boarding gate number and listen for any updates. It can change unexpectedly.
5. Don’t ignore security protocols. Following them efficiently saves time for you and everyone else.
")
2. Keep Your ID and Ticket/Boarding Pass Handy
Keeping your ID and ticket handy is crucial for a smooth airport experience, especially for first time travelers. From the moment you step into the airport, you’ll need to present your identification and boarding pass multiple times, at the entry gate, check-in counter, and security checkpoint. Fumbling through your bag at every step can cause unnecessary delays and stress. Instead, keep these documents in an easily accessible pocket, a travel pouch, or a mobile wallet if using an e-ticket. This small habit ensures a seamless process, allowing you to move through airport formalities with confidence and ease.
Do’s:
1. Use a dedicated travel pouch or wallet for your ID, boarding pass, and other essentials.
2. If using a digital ticket, ensure your phone is charged and the screen brightness is high for easy scanning.
3. Double-check that your name on the ticket matches your ID to avoid verification issues.
4. Keep a soft copy of your ticket and ID on your phone as a backup.
5. Have a pen handy in case you need to fill out any forms.
Don’ts:
1. Don’t place your ID and ticket in your checked baggage.
2. Don’t rely solely on mobile tickets. Technical glitches or a dead battery can create issues.
3. Don’t hand over your ID and ticket absentmindedly. Always double-check you’re giving the right documents.
4. Don’t mix up multiple boarding passes if you have connecting flights. Keep them organized to avoid confusion.
5. Don’t forget to collect your ID after security checks. It’s easy to leave it behind in a rush.
")
3. Check-In at the Counter or Use a Self-Check-In Kiosk
Once you enter the airport, locate your airline’s check-in counter. If you get confused as a first time traveler, it’s better to ask airport security personnel for directions instead of wasting time. At the check-in counter, present your ID and ticket to receive your boarding pass and drop off any checked luggage. Alternatively, many airports have self-check-in kiosks where you can print your boarding pass and baggage tags yourself, saving time. If you have only carry-on luggage, you can skip the counter and proceed directly to security after printing your pass. Make sure to confirm your seat assignment and baggage details before leaving the counter.
Do’s:
1. Use self-check-in kiosks if available to save time.
2. Verify your flight details on the boarding pass before leaving the counter.
3. Keep your baggage receipt in case of any issues later.
4. Ask staff if you’re unsure about anything instead of assuming.
5. If traveling internationally, check for immigration requirements before proceeding.
Don’ts:
1. Don’t lose your baggage receipt. It’s needed for tracking lost luggage.
2. Don’t check in late; airlines have strict cut-off times.
3. Don’t forget to confirm your seat selection if you have preferences.
4. Don’t mix up check-in and baggage drop. Know what you need to do.
5. Don’t leave valuables in your checked luggage. Keep them in your carry-on.
")
4. Drop Off Your Luggage (If Applicable)
At the airport, luggage is categorized into two main types: checked baggage and carry-on baggage. Checked baggage refers to larger suitcases or bags that you hand over to the airline at the check-in counter. These are stored in the cargo hold of the plane and can only be accessed after you land. Carry-on baggage, on the other hand, includes smaller bags that you keep with you during the flight and store in the overhead bin or under the seat in front of you. Airlines have specific weight and size restrictions for both types, so it’s essential to check your airline’s baggage policy in advance.
Once you’ve completed the check-in process, head to the baggage drop counter if you have checked luggage. Some airlines allow self-service baggage drop, while others require you to hand it over at the counter. Make sure your bag has a luggage tag and remove any old tags to avoid confusion.
Do’s:
1. Weigh your checked baggage at home to avoid last-minute surprises. Airlines charge extra if the baggage weight crosses the defined weight limit.
2. Attach a luggage tag with your name, contact details, and destination for easy identification.
3. Remove old airline tags to prevent confusion in baggage handling.
4. Keep valuables, electronics, and essential documents in your carry-on instead of checked baggage.
5. Double-check that your luggage is securely locked before dropping it off.
Don’ts:
1. Don’t pack prohibited items like oversized liquids, sharp objects, or power banks in your checked luggage.
2. Don’t forget to take a photo of your luggage. This helps in case it gets misplaced.
3. Don’t check in fragile items without marking them as ‘fragile’ or securing them properly.
4. Don’t leave your baggage unattended at any point in the airport.
5. Don’t rely solely on airline-provided luggage tags. Use your own tag as well for added security.
")
5. Go Through the Security Check
Once you are done with your luggage, you will head to the security check. This is one of the most crucial steps before boarding your flight, and being prepared can make the process quicker and hassle-free. At the security checkpoint, you must place all your carry-on items in trays on the conveyor belt for a thorough scan. Use multiple trays to keep your belongings organized, one for electronics such as your laptop, phone, and charger, and another for items like shoes, wallets, belts, and jackets.
Liquids, if allowed, should be in a transparent, resealable bag and must follow airline guidelines regarding quantity limits. If you are carrying any metal objects, such as keys or coins, it’s best to keep them in a small pouch to avoid last-minute scrambling. You will also need to walk through a security scanner, and in some cases, security personnel may conduct a manual check. Stay calm and follow instructions carefully to ensure a smooth process. Once cleared, collect your belongings promptly and reorganize them before heading toward your departure gate.
Do’s:
1. Follow the airport’s liquid restrictions (typically 100ml per container in a clear bag).
2. Wear easily removable shoes and minimal accessories to pass through security faster.
3. Take out electronic devices and place them in a separate tray.
4. Keep your boarding pass and ID easily accessible for verification.
5. Collect your belongings promptly after scanning to avoid crowding the area.
Don’ts:
1. Don’t pack prohibited items in your carry-on, such as sharp objects or large liquid bottles.
2. Don’t wear heavy jewelry or belts that can trigger metal detectors.
3. Don’t leave your belongings unattended after passing through the scanner.
4. Don’t block the security lane. Retrieve your items quickly and step aside.
5. Don’t argue with security personnel. Comply with their instructions to avoid delays.
")
6. Find Your Boarding Gate and Wait for the Announcement
Once you pass through the security check, head to your assigned boarding gate. Your gate number is usually printed on your boarding pass, but it’s always a good idea to check the airport’s flight information screens for any last-minute changes. If your departure time is near, proceed directly to the waiting area at your gate. If you have extra time before boarding, you can explore the airport, grab a bite to eat, freshen up in the washroom, or relax at a lounge. However, always keep an eye on the boarding announcements and be mindful of the time to avoid missing your flight.
Do’s:
1. Locate your boarding gate as soon as you clear security.
2. Stay near your boarding gate to avoid missing important announcements.
3. Check airport screens regularly for any gate changes or updates.
4. Use the waiting time efficiently. Grab a snack, visit the washroom, or charge your devices.
5. Keep an eye on the boarding process to avoid last-minute rush.
Don’ts:
1. Don’t wander too far from your gate, especially if your flight is boarding soon.
2. Don’t ignore gate announcements. They might include changes in boarding procedures.
3. Don’t block the boarding area or crowd the gate before your group is called.
4. Don’t rely only on last calls. Some airlines do not announce them separately.
5. Don’t fall asleep in a way that might make you miss your flight.
")
7. Board the Flight When Your Zone or Seat Is Called
Once your flight is ready for boarding, the airline staff will start calling passengers in groups based on their seat zones or class (e.g., business class, priority boarding, economy sections). Your boarding pass will indicate your seat and sometimes your boarding group. Pay close attention to the announcements and digital display screens to ensure you board at the right time. If you’re unsure, ask the airline staff for guidance. Avoid crowding the gate before your turn, as it slows down the process.
Do’s:
1. Listen carefully to boarding announcements and follow instructions.
2. Keep your passport, boarding pass, and any necessary documents in hand.
3. Board only when your designated zone or group is called.
4. Store your cabin luggage efficiently in the overhead bin or under the seat in front of you.
5. Be mindful of fellow passengers. Move quickly and don’t block the aisle.
Don’ts:
1. Don’t rush to board before your group is called. It creates unnecessary congestion.
2. Don’t ignore gate staff instructions. Boarding order is designed for efficiency.
3. Don’t leave your boarding pass in your bag. Keep it handy.
4. Don’t block the aisle while stowing your luggage; step aside if needed.
5. Don’t swap seats before takeoff. Wait until the cabin crew allows it.
")
After Landing: Step-by-Step Guide for First Time at the Airport
Landing at your destination is just the beginning of the final airport process. If it’s your first time at the airport, you’ll need to navigate immigration (if applicable), collect your baggage, and proceed through customs before exiting the terminal. Here’s what to do next.
8. Deplane and Navigate to Baggage Claim
Once you land at the airport, don’t rush. Wait for instructions and follow them. You will be asked to exit the aircraft in an orderly manner. Depending on the airport, you may either walk through a jet bridge directly into the terminal or be taken to the arrival gate by a shuttle bus. After exiting the aircraft, follow the signs leading to baggage claim if you have checked luggage. If you are on a connecting flight, look for signs directing you to transfer areas. Keep your documents, such as your boarding pass and identification, easily accessible in case airport staff ask for verification.
Do’s:
1. Follow the instructions given by the cabin crew and airport staff as soon as you land.
2. Keep your boarding pass and ID handy in case you need to show them during transit.
3. Be patient and wait your turn when exiting the plane.
4. Follow the signs to baggage claim carefully.
5. If you’re unsure about where to go, don’t hesitate to ask an airport staff member for assistance.
Don’ts:
1. Don’t rush or crowd when exiting the aircraft. It can lead to unnecessary confusion.
2. Don’t forget to double-check your gate or baggage claim area before leaving the plane.
3. Don’t ignore signs or directions from airport staff.
4. Don’t leave your belongings unattended, even for a moment.
5. Don’t wander aimlessly. Stay on the designated paths leading to baggage claim or transfer areas.
")
9. Collect Your Checked Luggage (If Applicable)
Once you’ve deplaned and followed the signs to the baggage claim area, it’s time to retrieve your checked luggage (if applicable). Head to the designated luggage pickup area, and make sure to keep an eye on the overhead monitors for updates on which conveyor belt your luggage will be on. Your bag will come out on the conveyor belt, so keep an eye out as it may take some time for it to appear. Don’t worry if it doesn’t show up immediately; patience is key at this stage. Ensure you’ve identified your bag clearly to avoid confusion with others that may look similar.
Do’s:
1. Wait patiently for your luggage to appear on the conveyor belt.
2. Check your luggage tag to ensure it’s your bag before picking it up.
3. Notify the staff immediately if you realize you’ve picked up the wrong luggage.
4. Keep an eye on the baggage claim area to avoid confusion with similar bags.
5. Double-check your luggage before leaving the pickup area to avoid errors.
Don’ts:
1. Don’t rush when picking up your luggage. Take the time to check your bag.
2. Don’t leave the baggage claim area without confirming your luggage.
3. Don’t ignore the baggage tag. It helps identify your bag.
4. Don’t take someone else’s luggage even if it looks similar.
5. Don’t forget to report any issues to the airport staff as soon as possible.
")
10. Exit the Airport and Arrange Transportation to Your Destination
After picking up your luggage, head to the exit gate. Some smaller airports, like Jaipur, have a quicker exit process, while larger ones may have a longer ramp. At the exit, you’ll find airport taxis available for hire. However, it’s often more cost-effective to book your ride online in advance. Airport taxis usually charge higher fares compared to other services like Uber/Ola. I remember during my first flight to Jaipur with my mother, I checked the airport taxi fare, and it was three times the price of an Uber ride! But keep in mind, in certain places like Goa, you might not find services like Ola or Uber easily due to the local taxi mafia. In such cases, it’s better to rely on pre-booked taxis or arranged transportation.
Do’s:
1. Always book your taxi or transportation in advance when possible.
2. Follow the signs at the airport to locate the exit and transportation area.
3. Keep your travel apps ready on your phone for easy access to ride-sharing services.
4. If you decide to use an airport taxi, verify the fare and ensure it matches the official rate.
5. Consider local transport options if Uber/Ola isn’t available in the area.
Don’ts:
1. Don’t rush out without confirming your transport options, especially in unfamiliar cities.
2. Don’t blindly accept overpriced taxis without checking for alternative options.
3. Don’t forget to check the cab service’s rating if you’re using an app-based ride.
4. Don’t fall for unofficial taxi drivers or unauthorized services at the airport.
5. Don’t ignore local travel advisories or restrictions when arranging transportation.
")
Top 10 Common Mistakes to Avoid at the Airport - Guide to the First Timers
Taking flight as a solo traveler for the first time can be both exciting and overwhelming. With the bustling airport environment, it’s easy to make mistakes that could lead to unnecessary stress. Be it getting caught up in long lines, missing important steps in the process, or overlooking key details, small errors can turn your trip into a hassle. Here’s a list of common mistakes to avoid if it’s your first time at the airport, so you can be more mindful and avoid them, making your experience smoother and more enjoyable.
1. Overpacking or carrying unnecessary items – Traveling light is key. Avoid overstuffing your bag with items you don’t need, as it can slow you down during check-in, security, and boarding.
2. Ignoring airport layout – Not familiarizing yourself with the airport layout can lead to confusion and panic, especially if you’re in a rush. Make sure to check signs or use the airport’s mobile app for navigation.
3. Not having a backup for important documents – Relying solely on physical copies of documents like your passport or boarding pass can be risky. Have digital backups on your phone or in the cloud just in case.
4. Skipping the pre-trip checklist – Forgetting to check your flight details, baggage restrictions, or required documents can cause last-minute issues. Make sure to double-check everything before leaving home.
5. Not setting an alarm to wake up on time – It’s easy to get caught up in the excitement of the trip, but failing to wake up early can put you in a rush and leave you with little time for unexpected delays.
6. Not staying hydrated or eating before the flight – Airports can be chaotic, and it’s easy to forget to eat or drink before boarding. Avoid the discomfort of dehydration or hunger during the flight by staying prepared.
7. Not checking the weather at your destination – Failing to check the weather forecast can lead to uncomfortable packing or a bad surprise when you arrive at your destination.
8. Overlooking travel insurance – First-time travelers often neglect travel insurance. It’s essential to have it in case of emergencies like flight delays, cancellations, or health-related issues.
9. Getting stressed over minor delays – Airports can be unpredictable. Instead of stressing over small delays or hiccups, stay calm, adjust your plans accordingly, and keep your focus on the bigger picture.
10. Assuming every flight is on time – Relying on the idea that flights will always depart on schedule is a mistake. Keep an eye on flight updates and airport announcements for potential delays or gate changes.
![]()
![]()